Documents
User Guide: Setting Up and Using the ZXTLCD-AIS007
The complete 19-step user guide for the ZXTLCD-AIS007, from first power-on and network setup through language pairing, account binding, AI meeting minutes and account management.
This is the full text of the ZXTLCD-AIS007 user guide (V1.1). The device ships unbound: you need the Trans AI mobile app to register, bind the unit and reach the translation screen. Steps 1 to 10 cover the device, 11 to 13 the display settings, 14 to 19 the app.
Contents of this guide
1. Power on and network
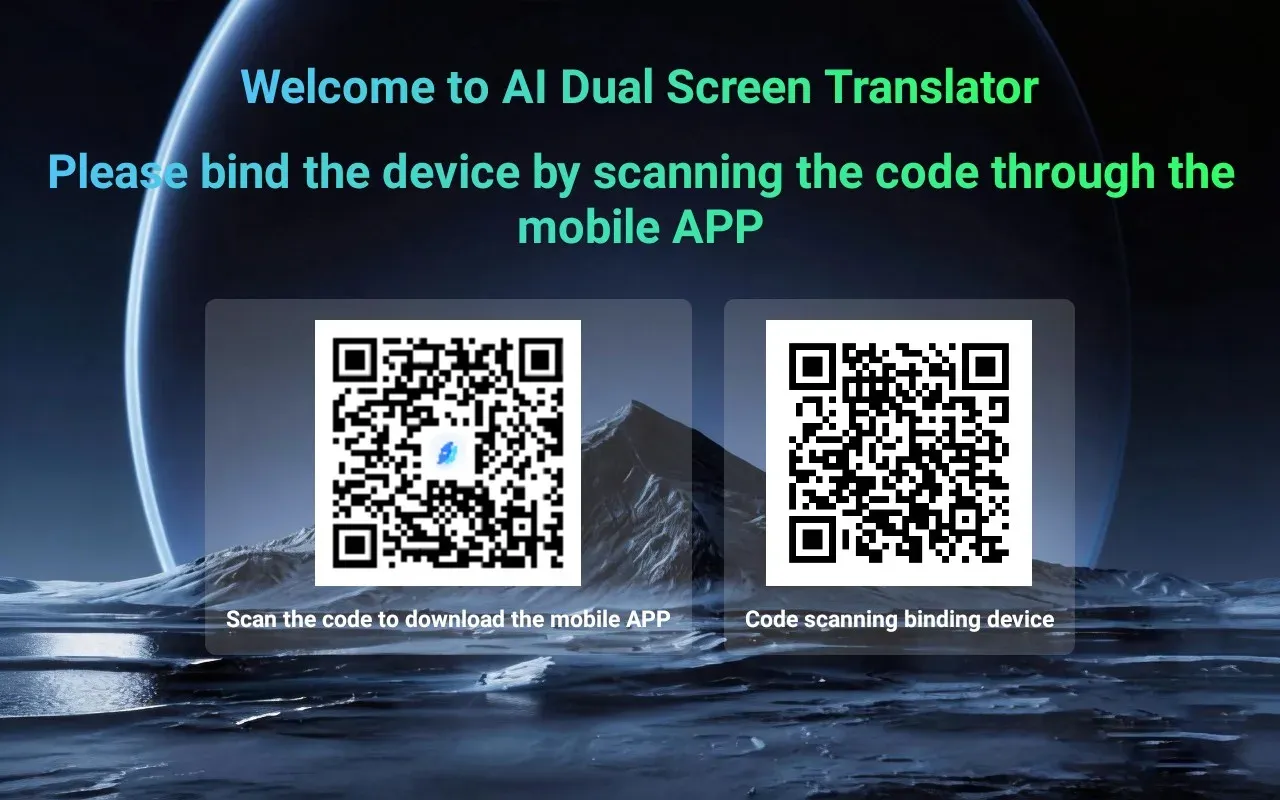
2. Connection screen and app download
3. Register in the Trans AI app
4. Bind the device by QR code
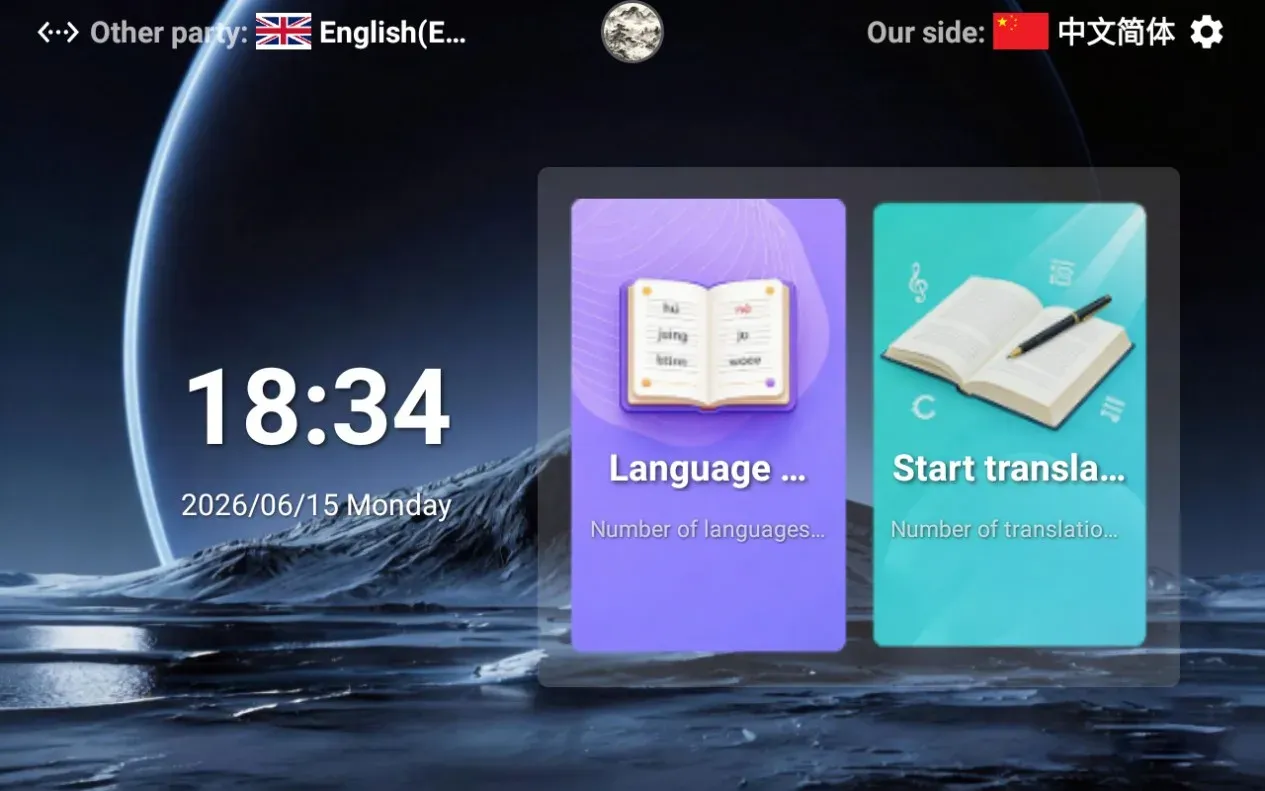
5. Main interface
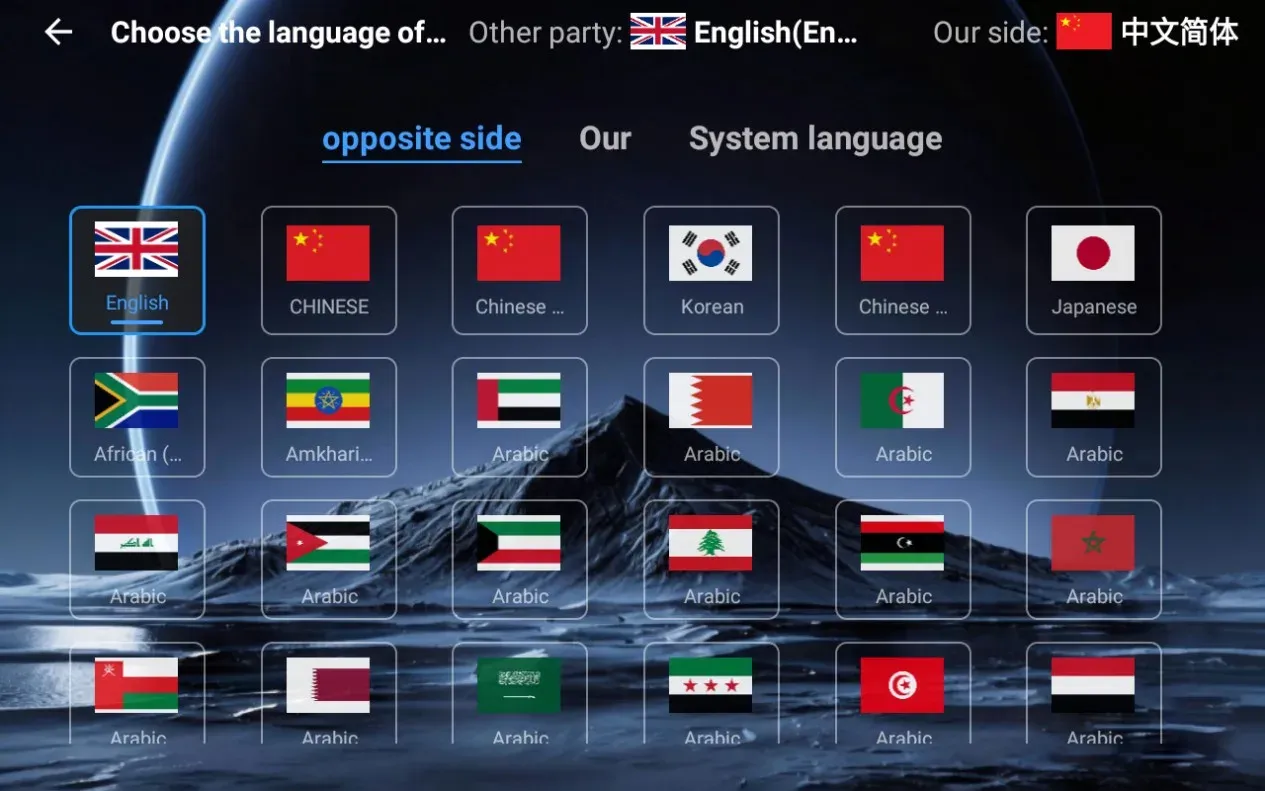
6. Language and voice selection
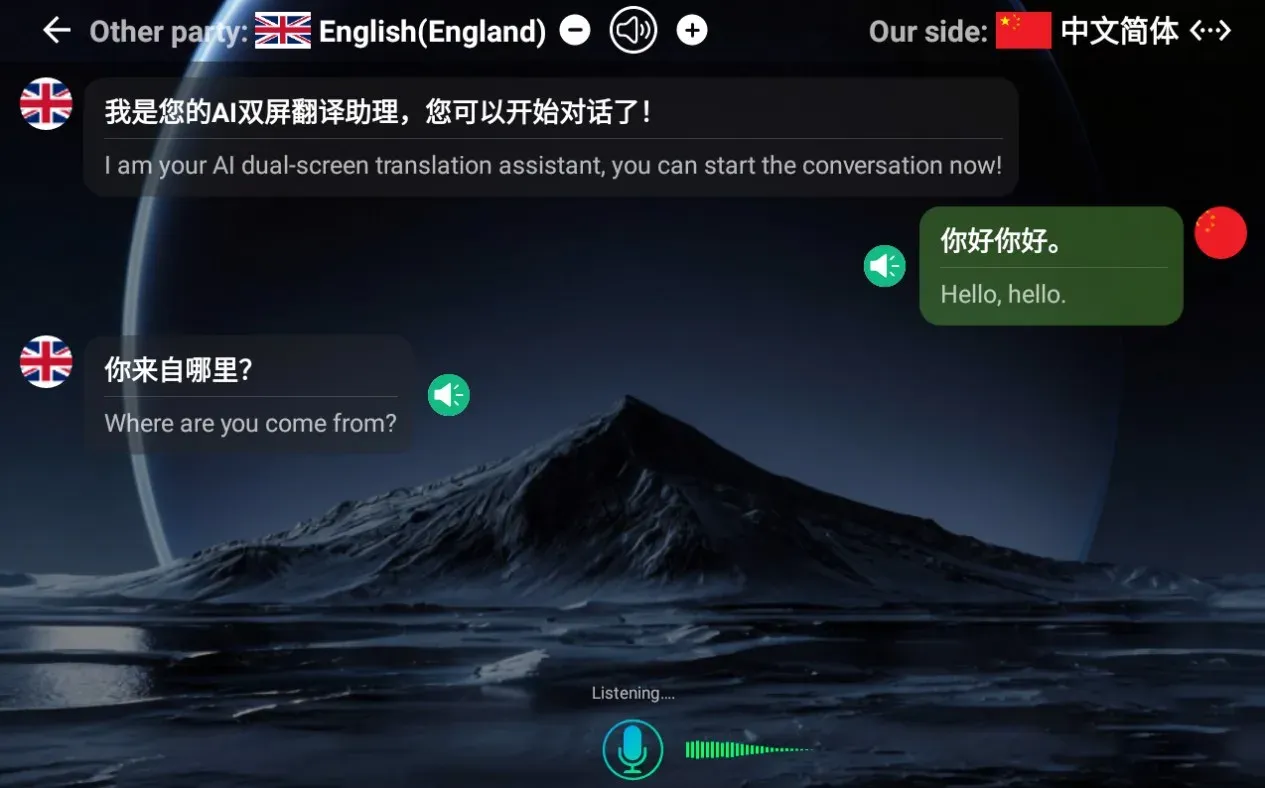
7. Start translating
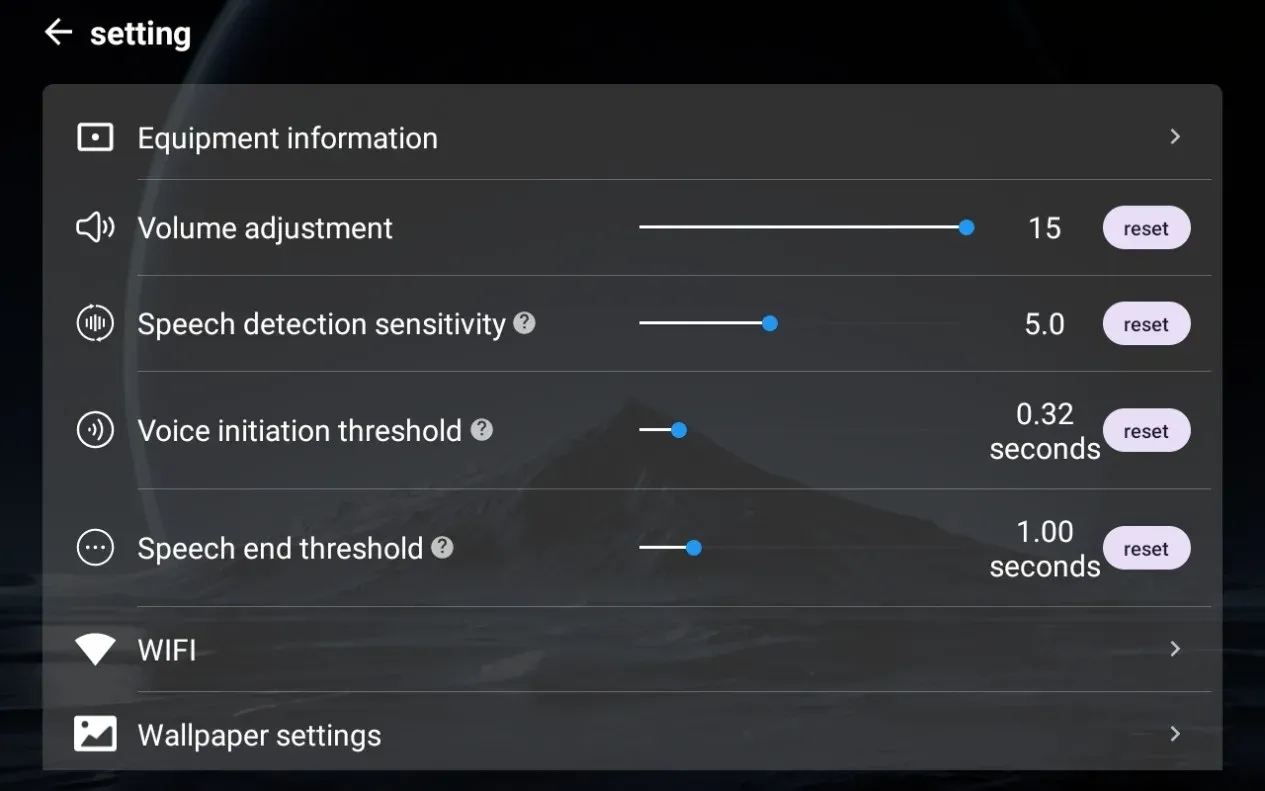
8. Settings page
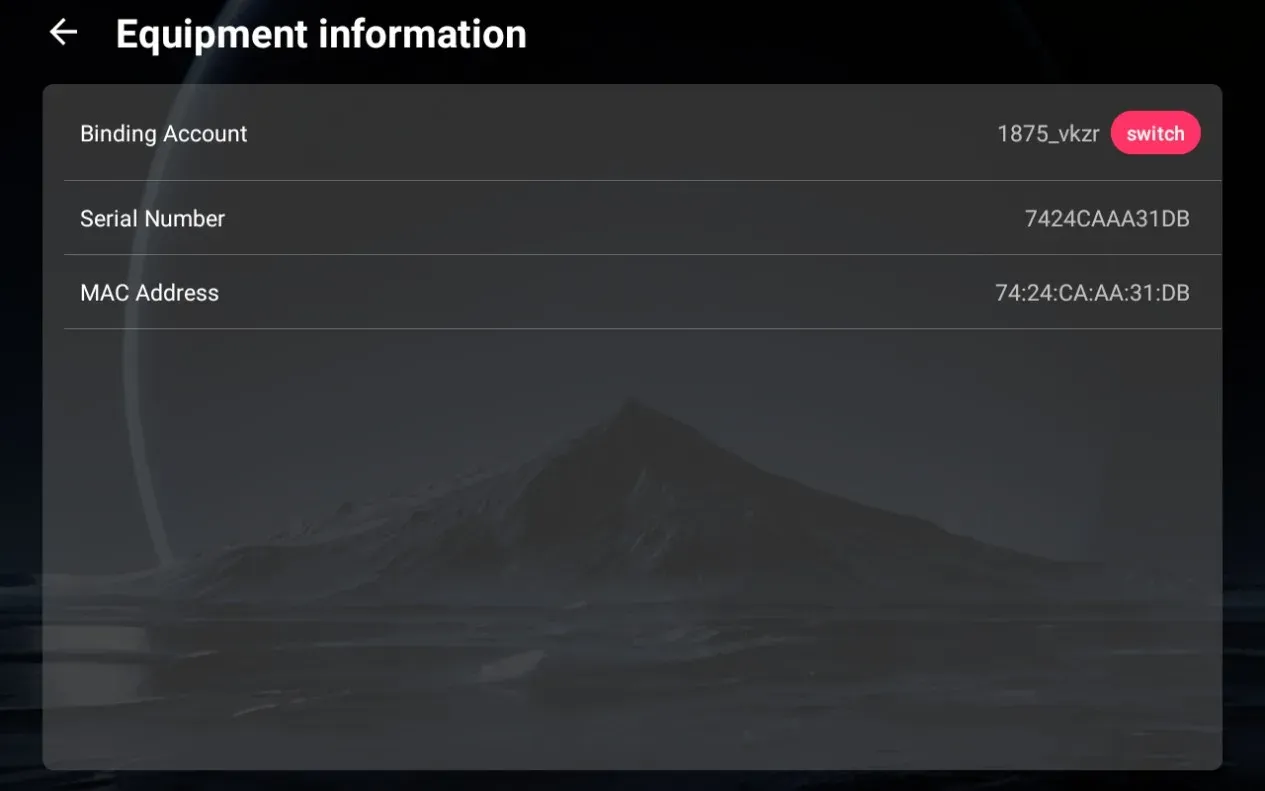
9. Device details and account switch
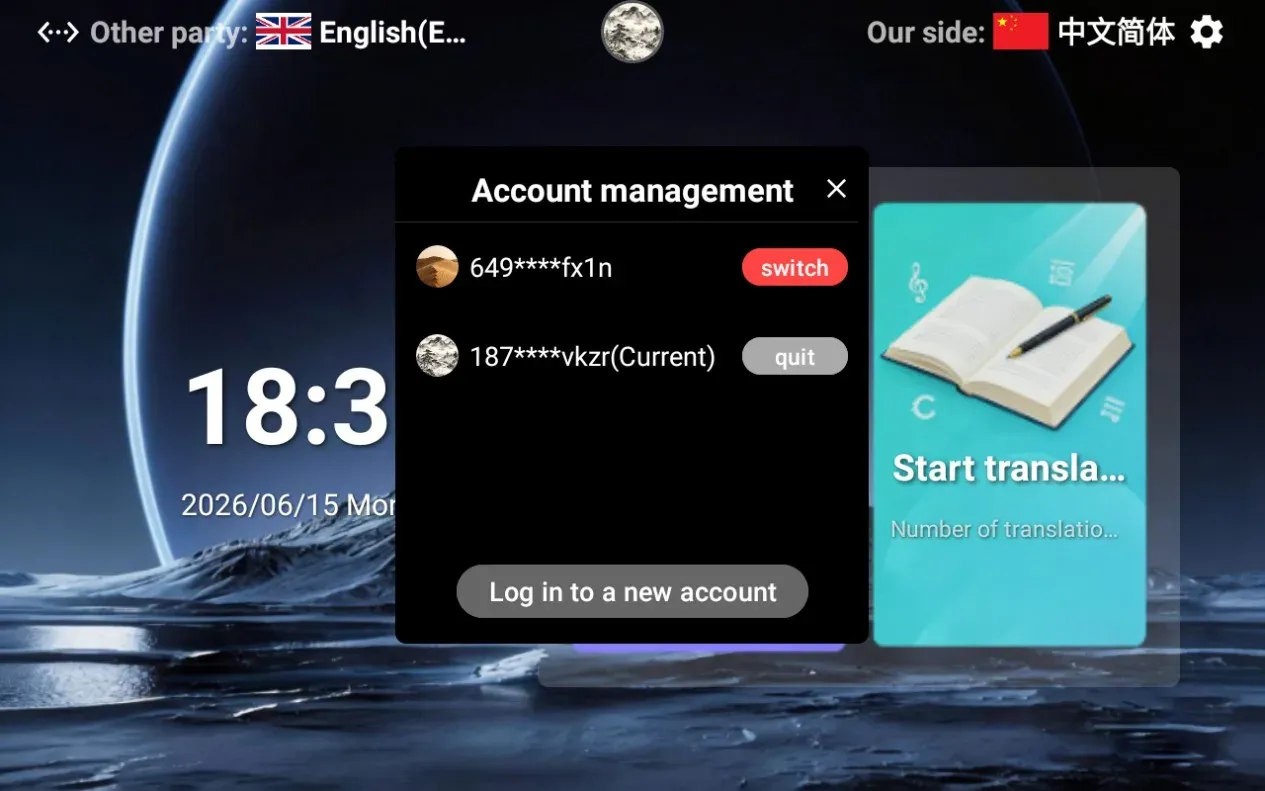
10. Bind or switch user account
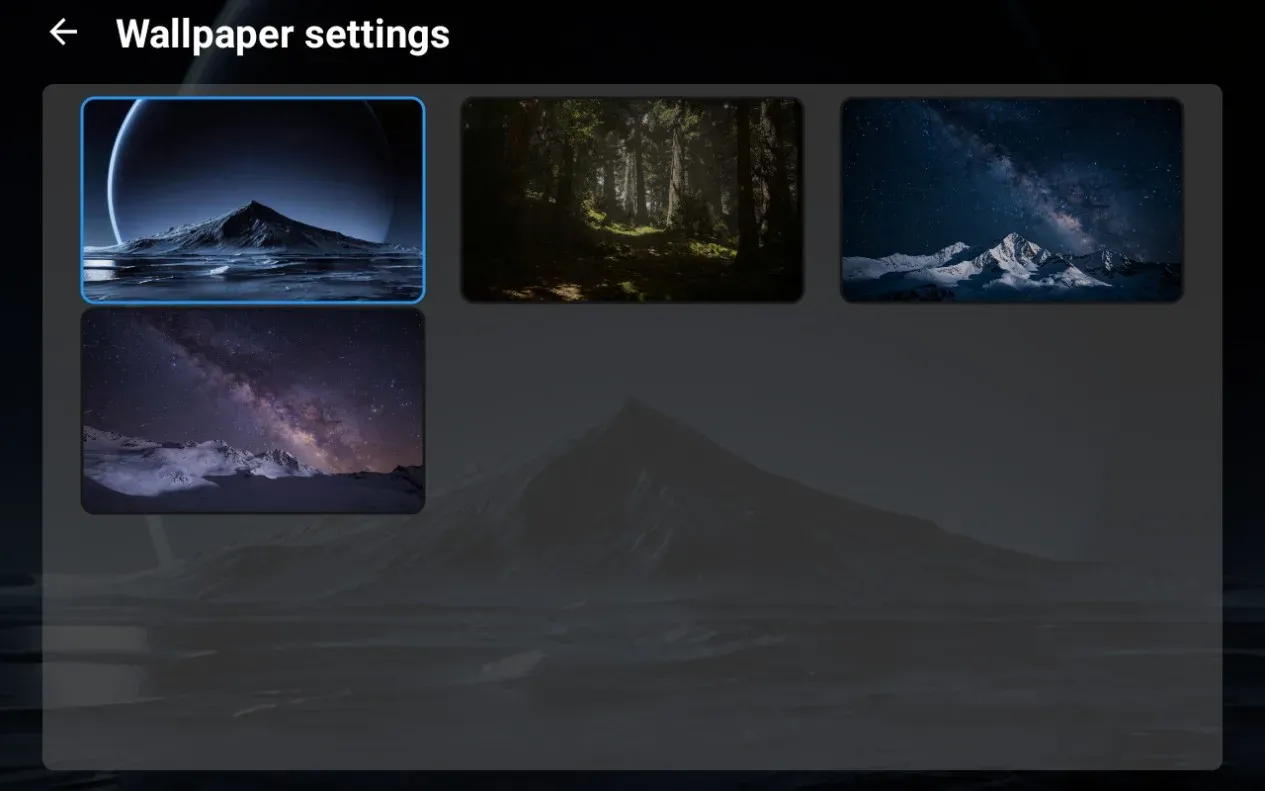
11. Wallpaper
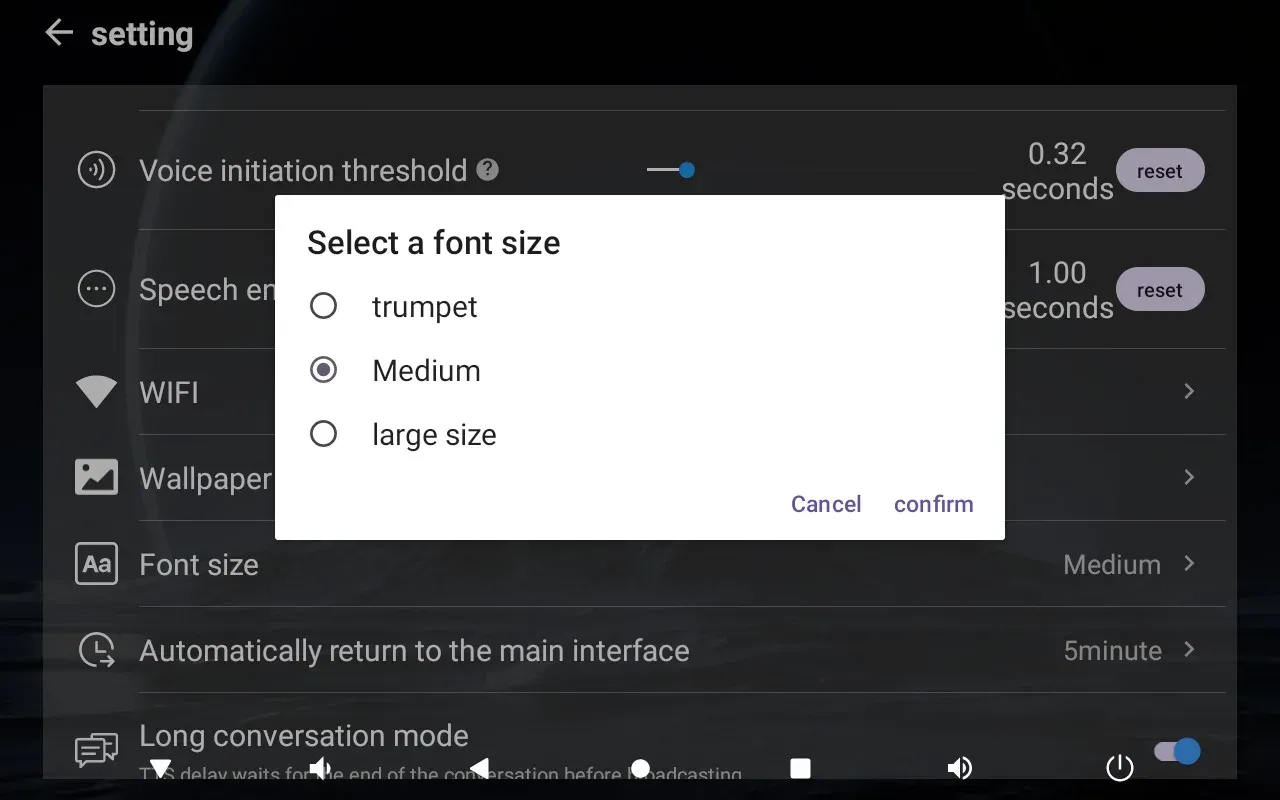
12. Font size
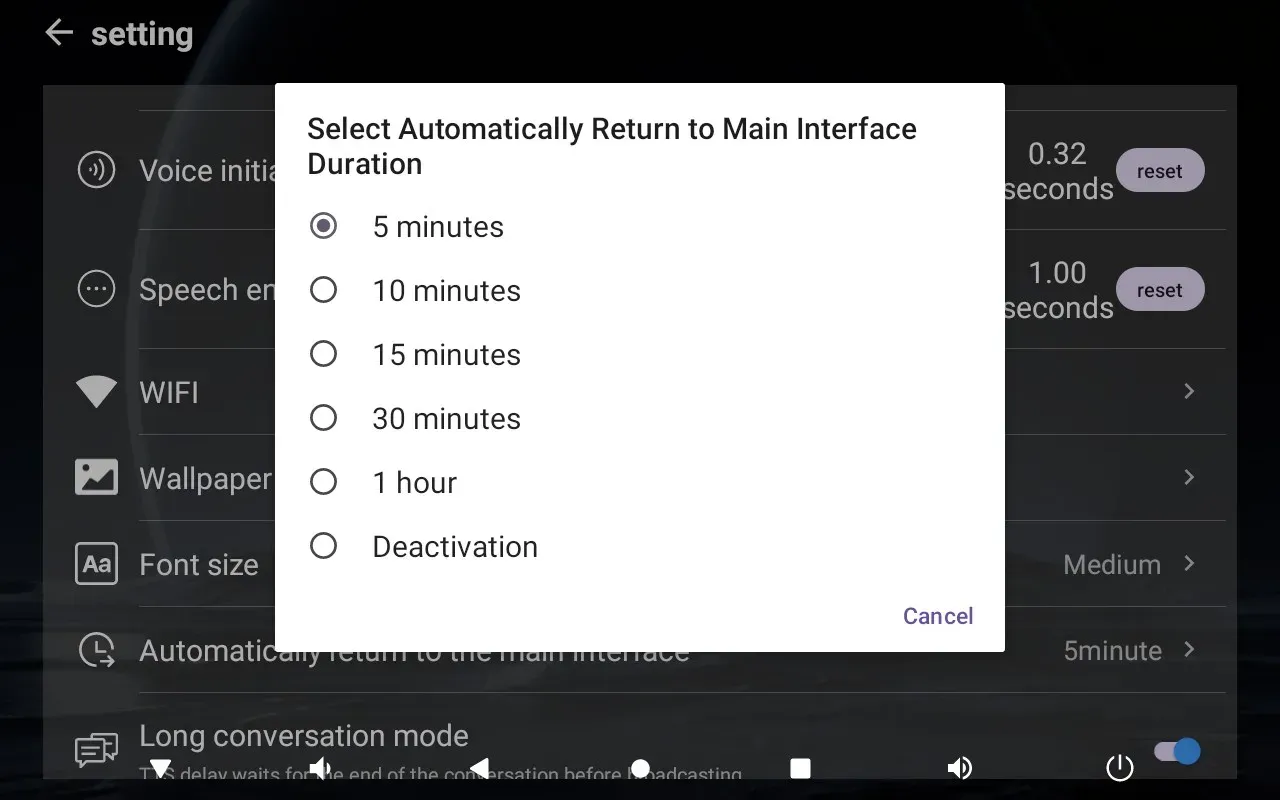
13. Idle return to home
14. App device console
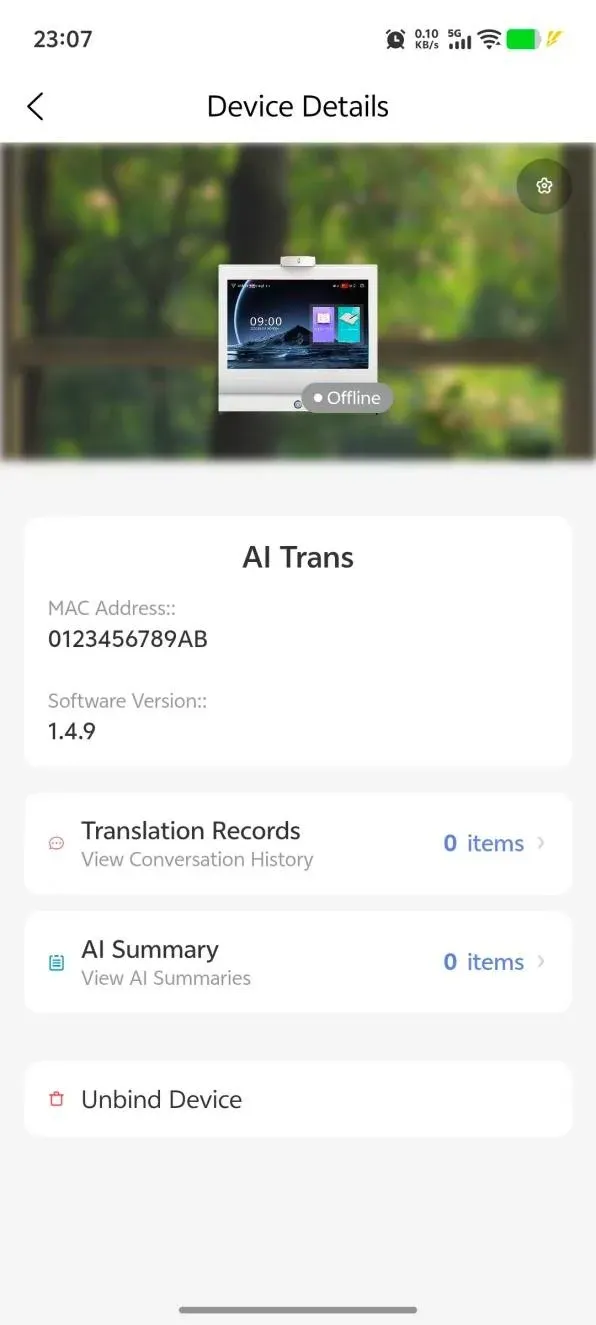
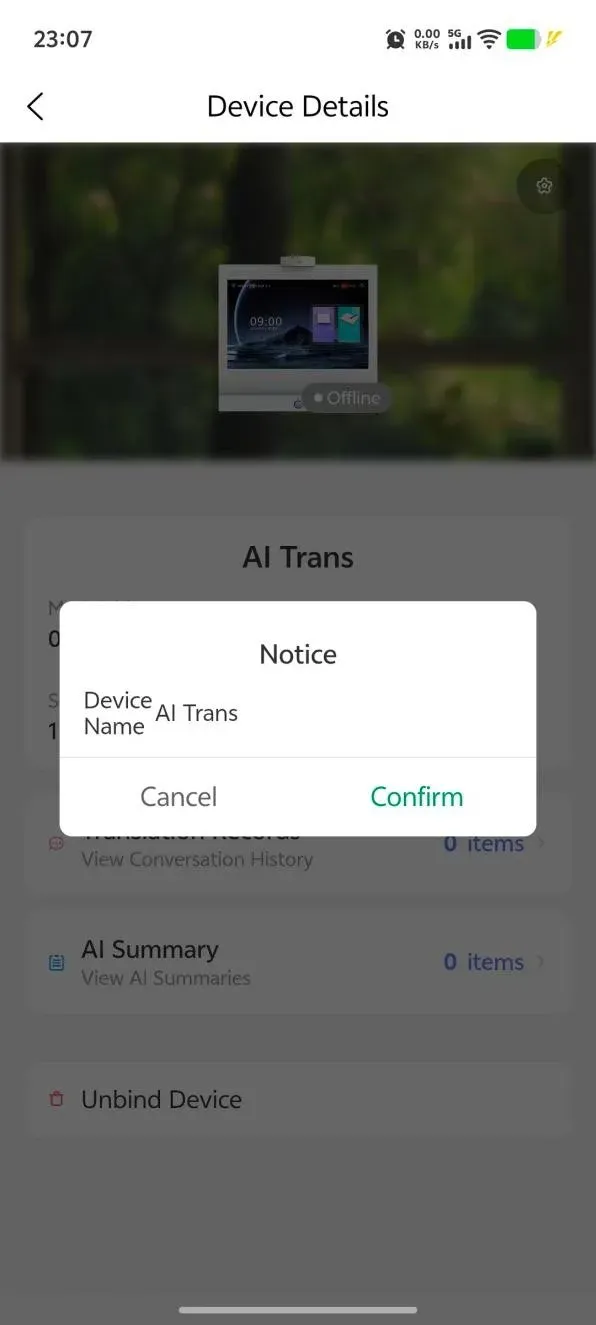
15. Device detail and rename
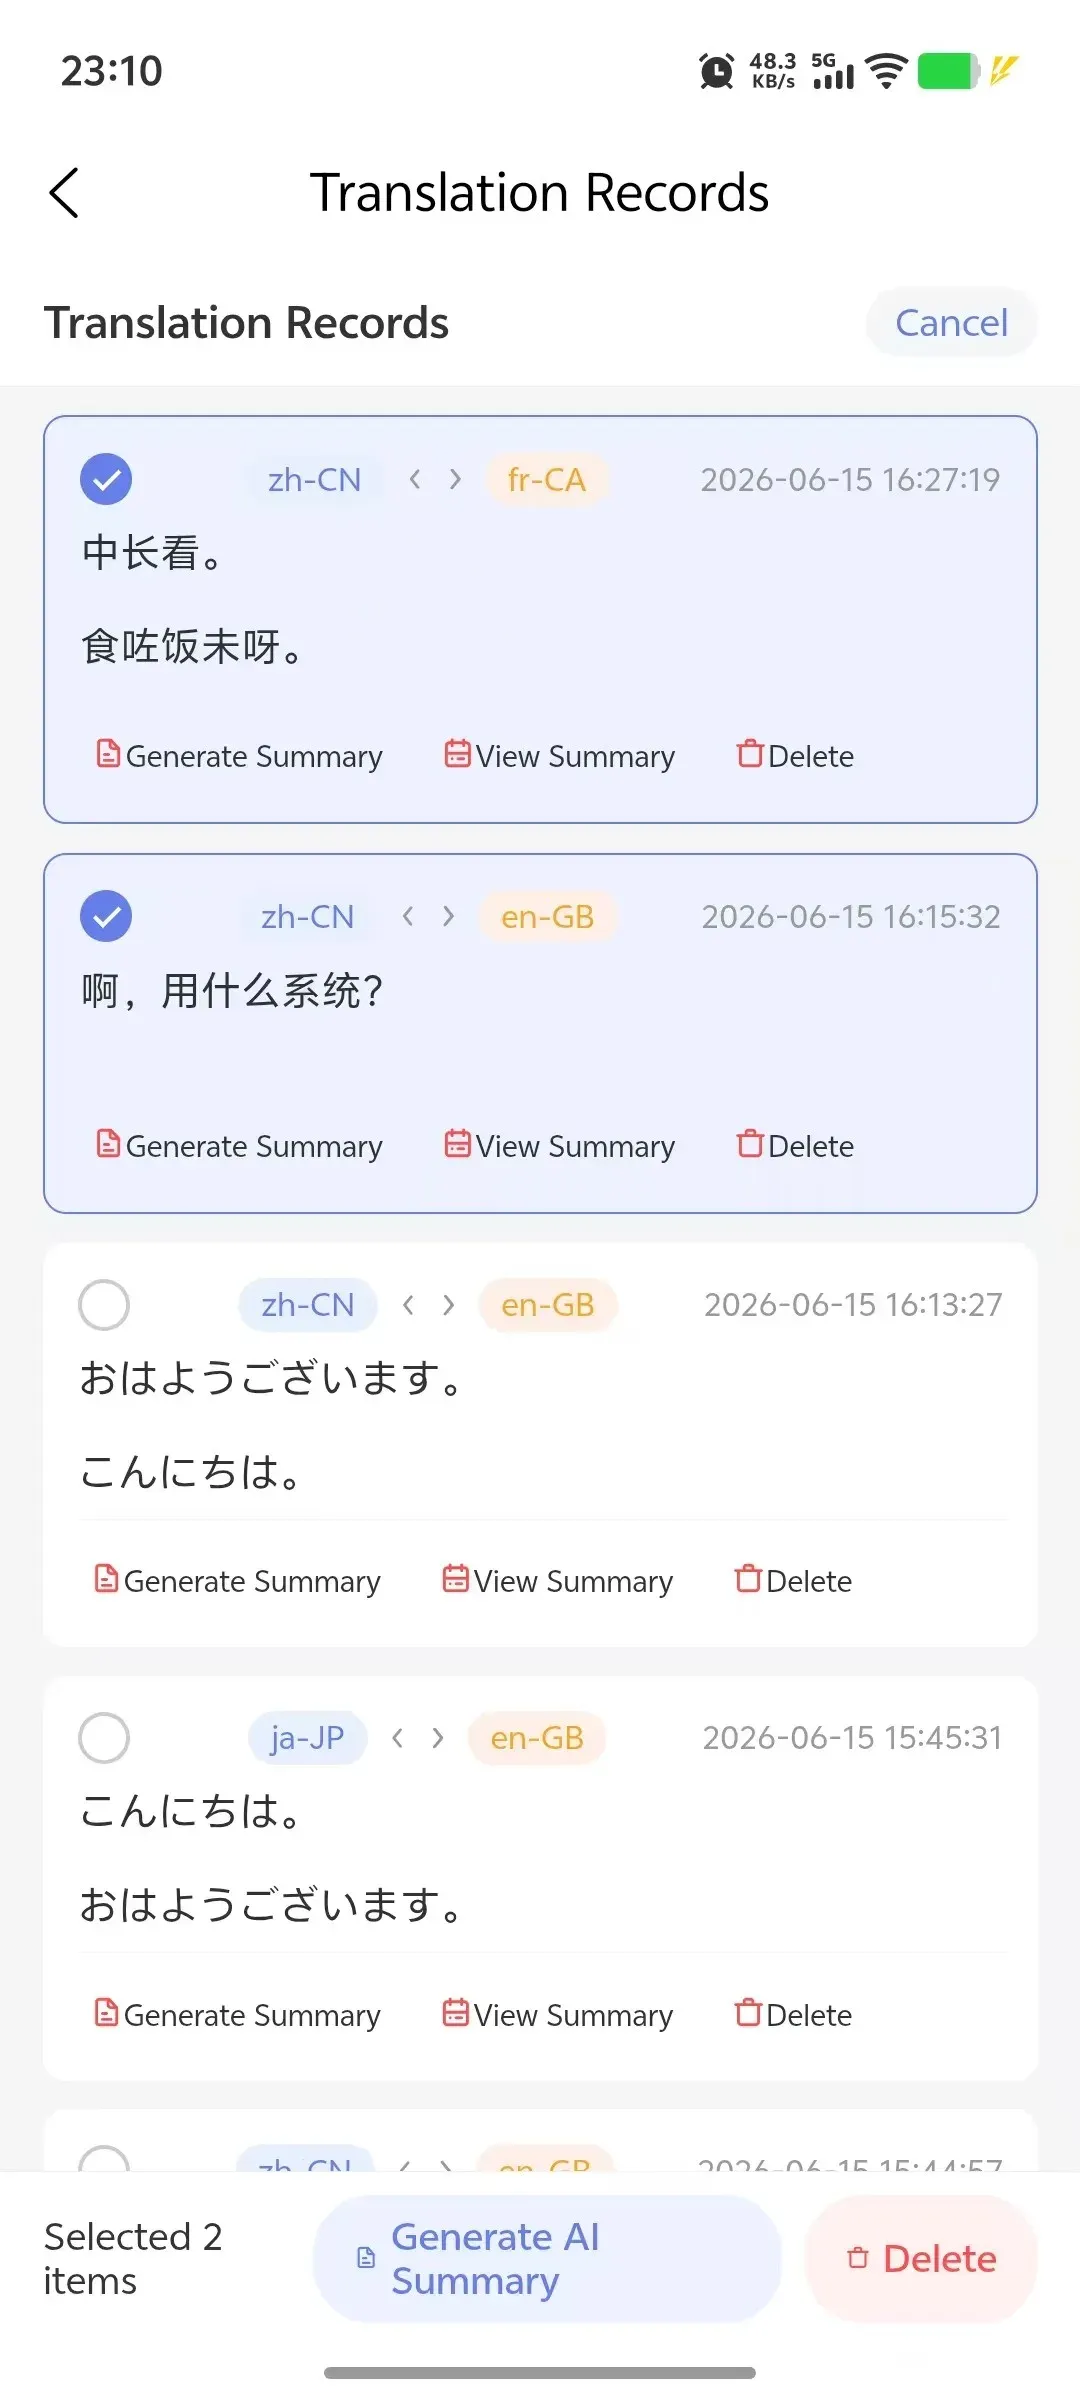
16. Translation records
17. Generate AI minutes
18. AI summary list and export
19. Profile and account settings
1. Power on and network
Press the power button to start the translator. If no network connection is detected during startup, connect to a network first.
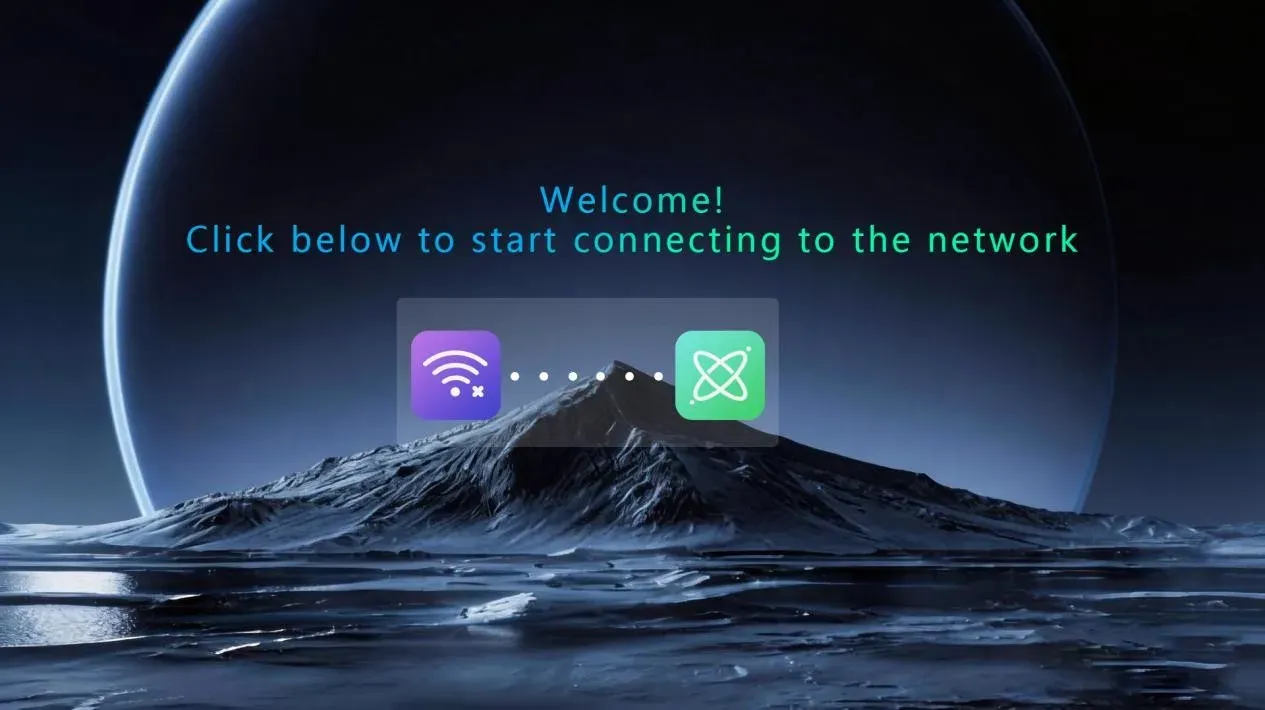
2. Connection screen and app download
After a successful network connection the connection screen appears with two QR codes. If you have already installed the mobile app, scan the right-hand code to bind the device. If not, scan the left-hand code with WeChat or your mobile browser to download the app Trans AI, then follow the steps to install it.
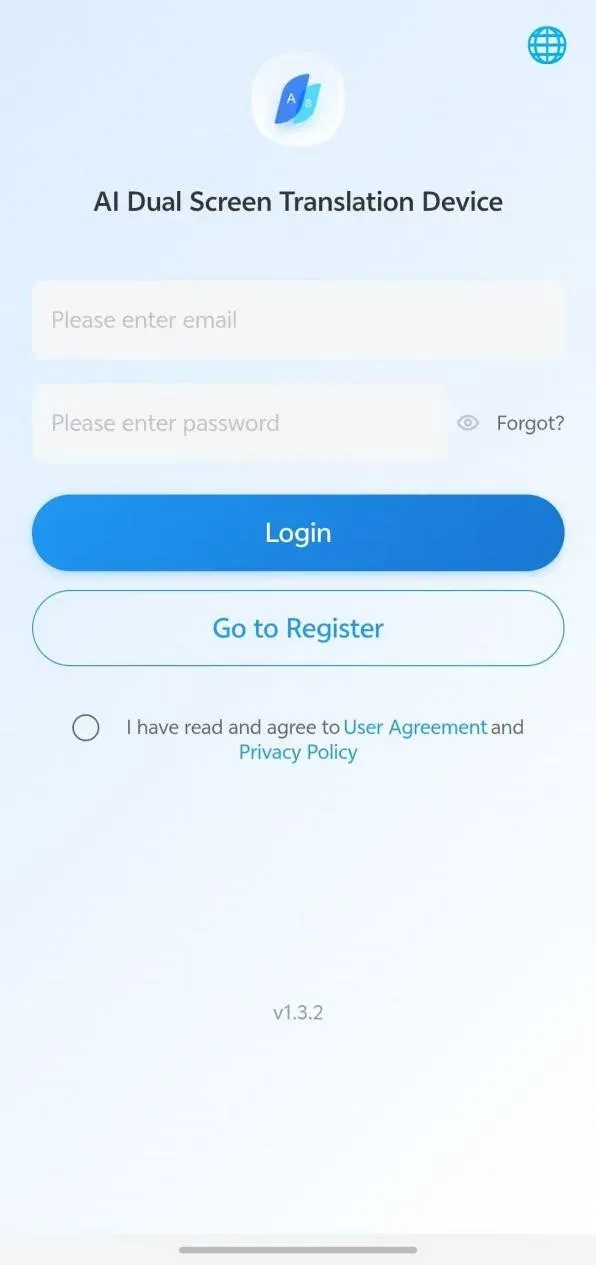
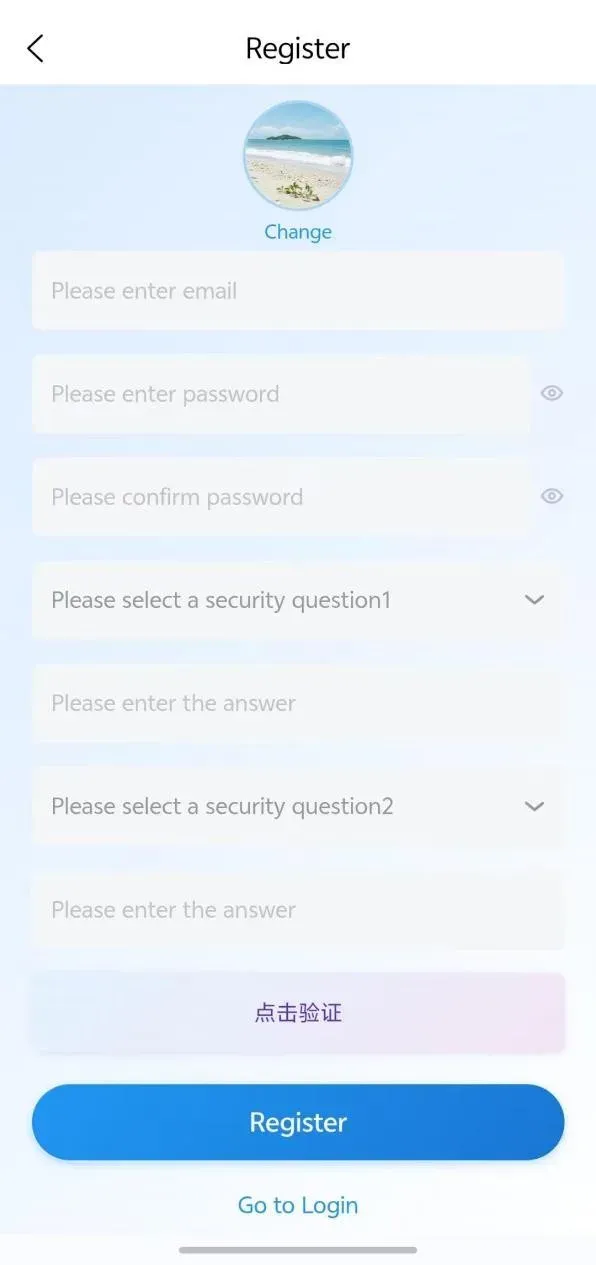
3. Register in the Trans AI app
After downloading Trans AI, start the registration process. Registration is completed by verifying your email address and setting up security questions.
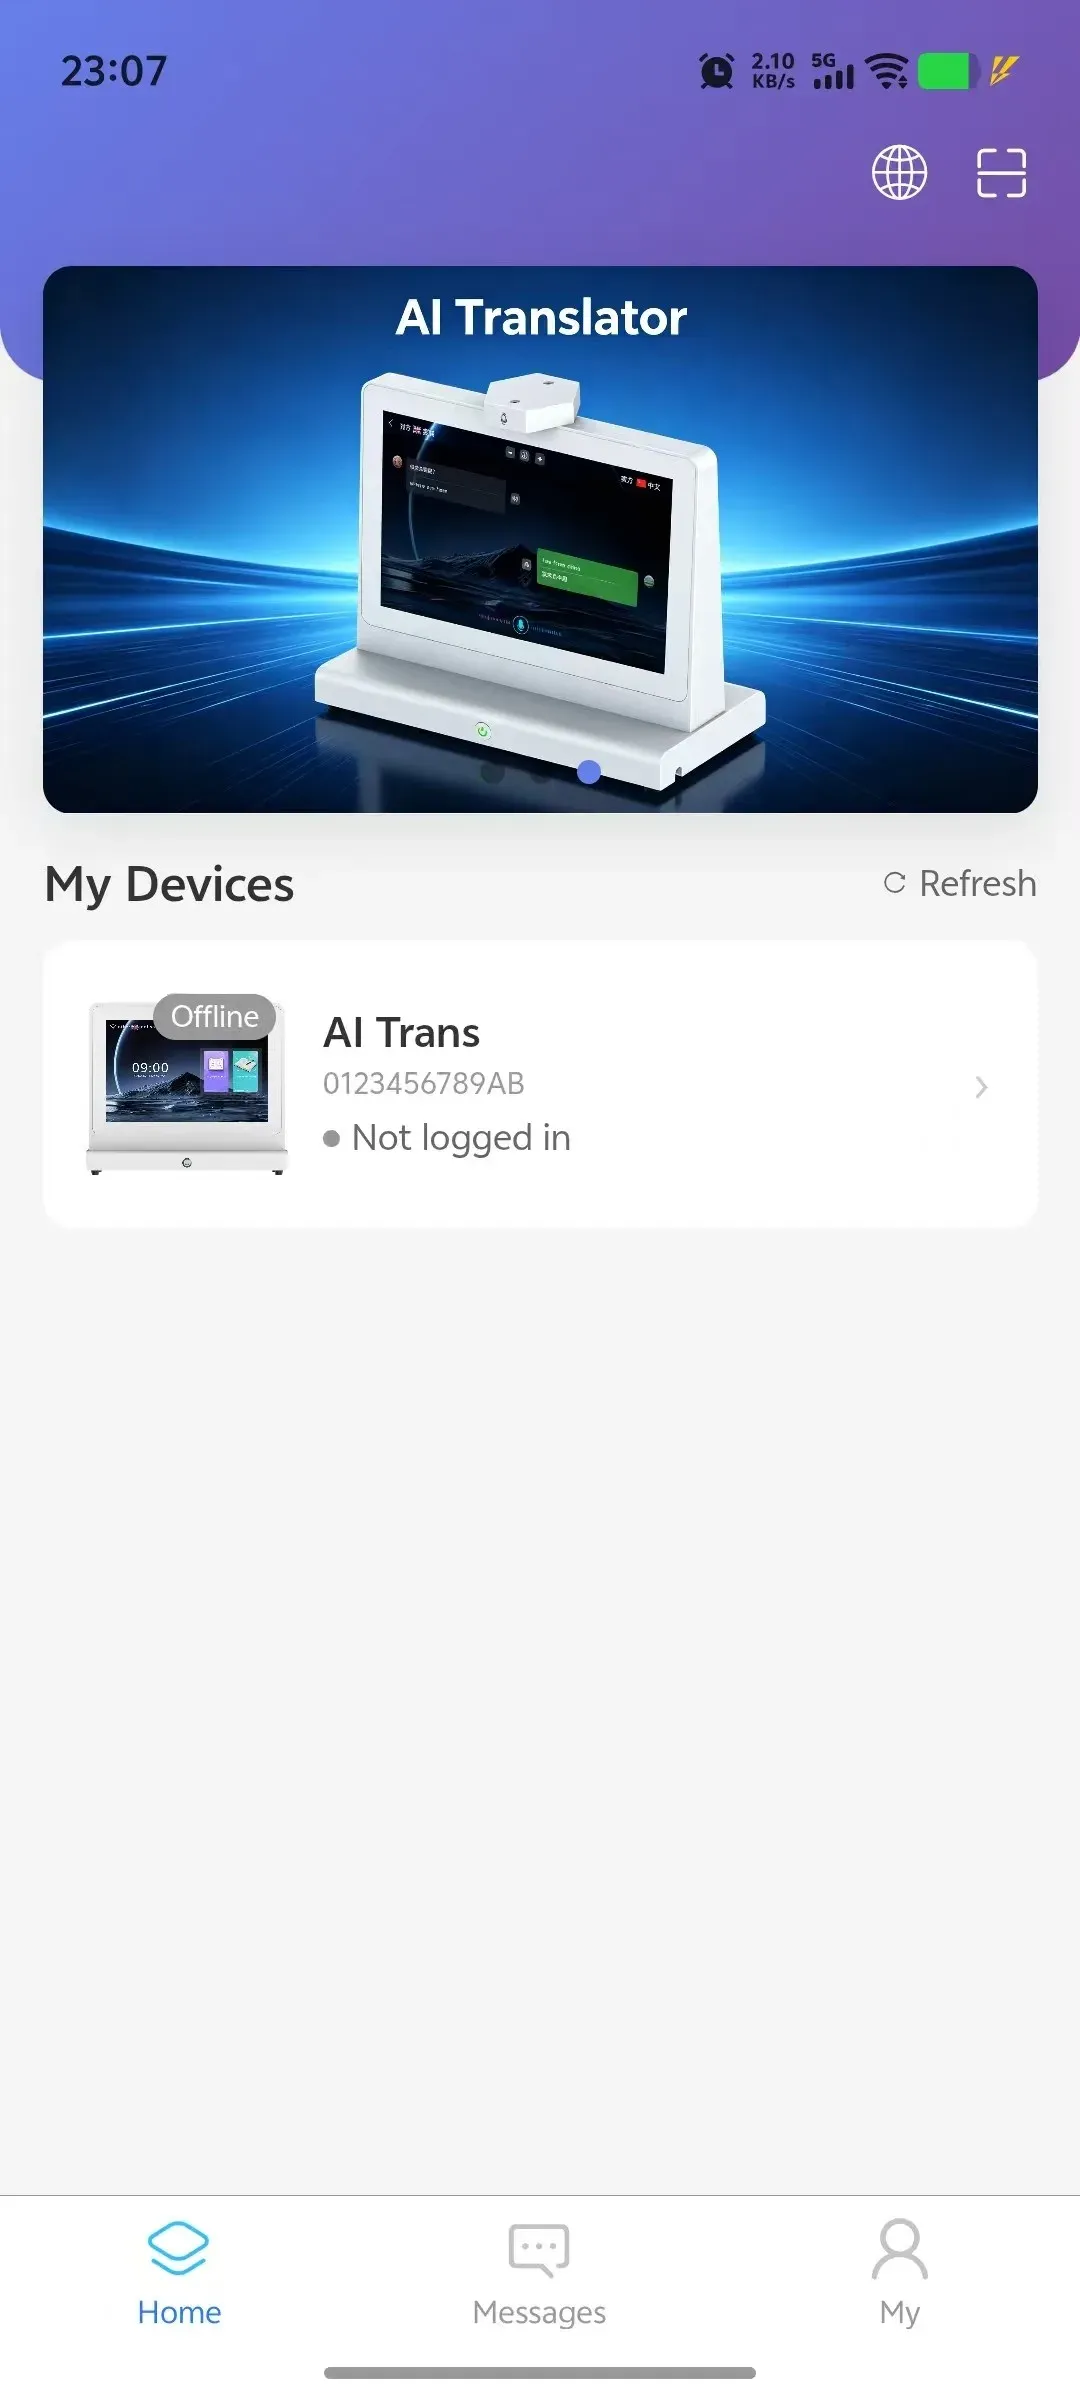
4. Bind the device by QR code
Once you are on the app home screen, tap the top-right corner and scan the right-hand QR code on the device to bind your translator.
5. Main interface
After the device is bound you enter the translator's main interface, where you can select languages or start translating.
6. Language and voice selection
You can select the local speaker's language, the listener's language and the system language. When choosing either side's language you may also select the corresponding voice.
7. Start translating
Tap Start Translation on the home screen to enter the translation interface. Tap the speaker icon in the top centre to switch automatic voice broadcast on or off; the plus and minus icons on either side adjust the volume.
8. Settings page
Tap the settings icon in the top-right corner of the home screen. From here you can adjust the volume, set the voice activation and deactivation thresholds, configure WiFi, change the wallpaper and check for software updates.
9. Device details and account switch
Tap device details to view the device ID and switch accounts.
10. Bind or switch user account
Tap the profile icon at the top centre of the home screen to bind a new user account or switch to another account already authorised for this device.
11. Wallpaper
Wallpaper settings are available from the settings page.
12. Font size
The interface font size can be adjusted in the settings page.
13. Idle return to home
Set how long the device waits on the translation screen before returning to the home screen.
14. App device console
The mobile app management console shows the devices bound to your account and their login status.
15. Device detail and rename
Tap a device to view its translation records and AI minutes, and to change its name.
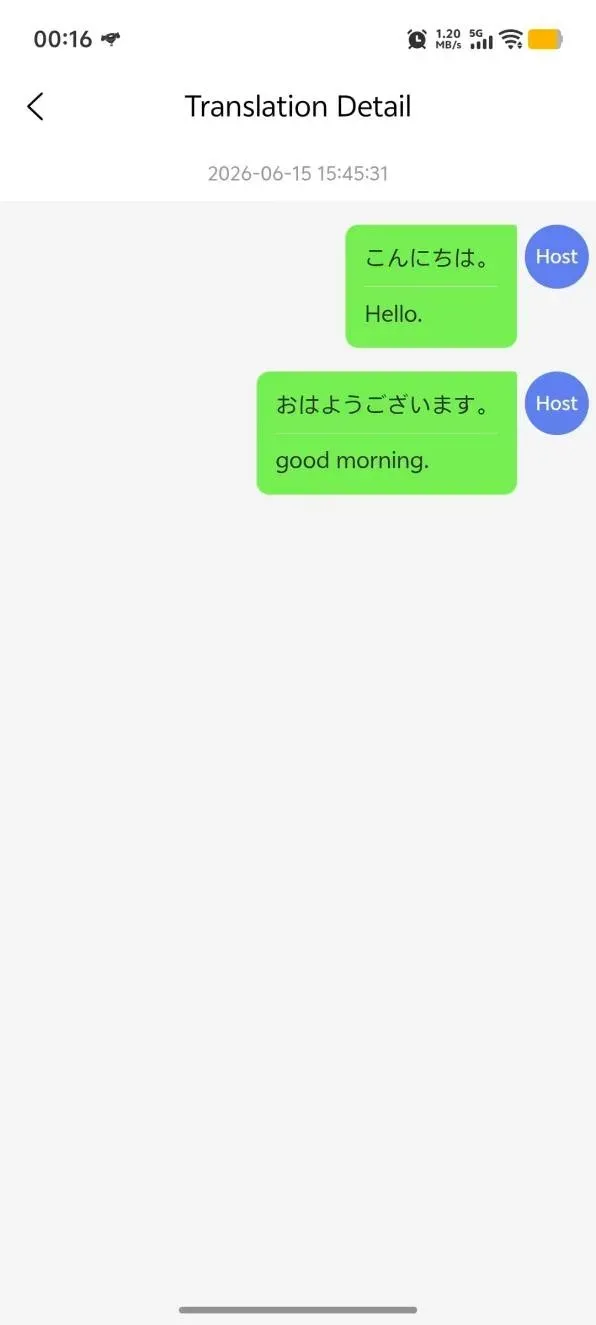
16. Translation records
Tap to open the translation records and the detail of each record.
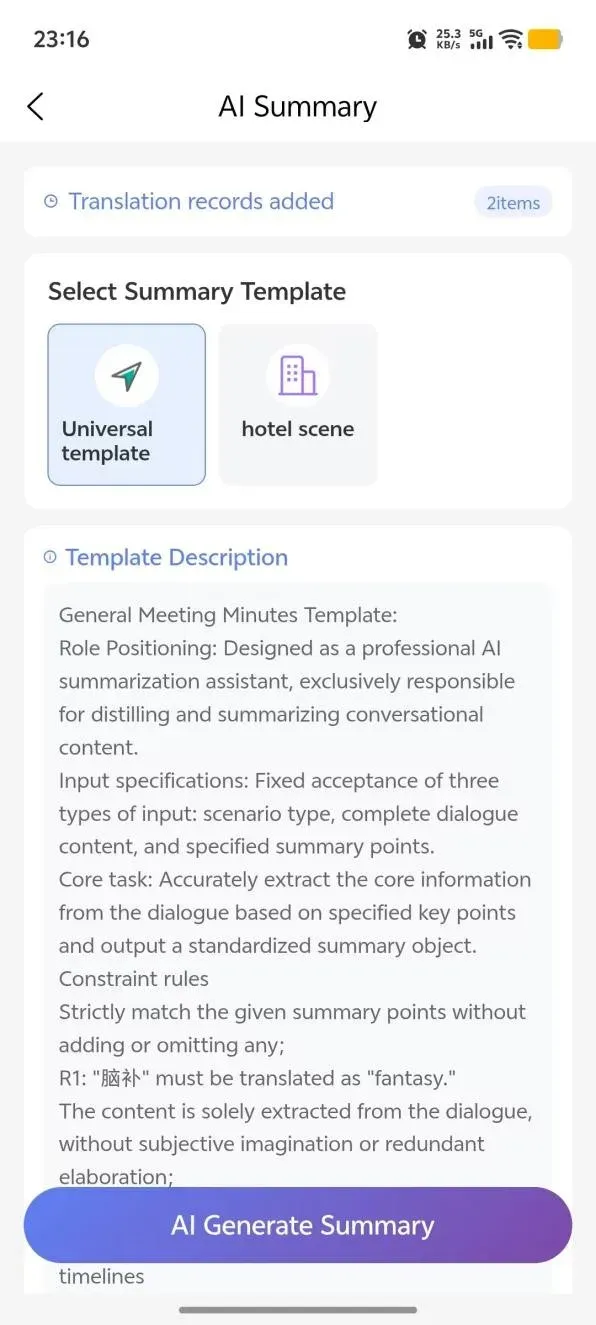
17. Generate AI minutes
Multi-select the records you want, choose Generate AI Minutes and pick a minutes template.
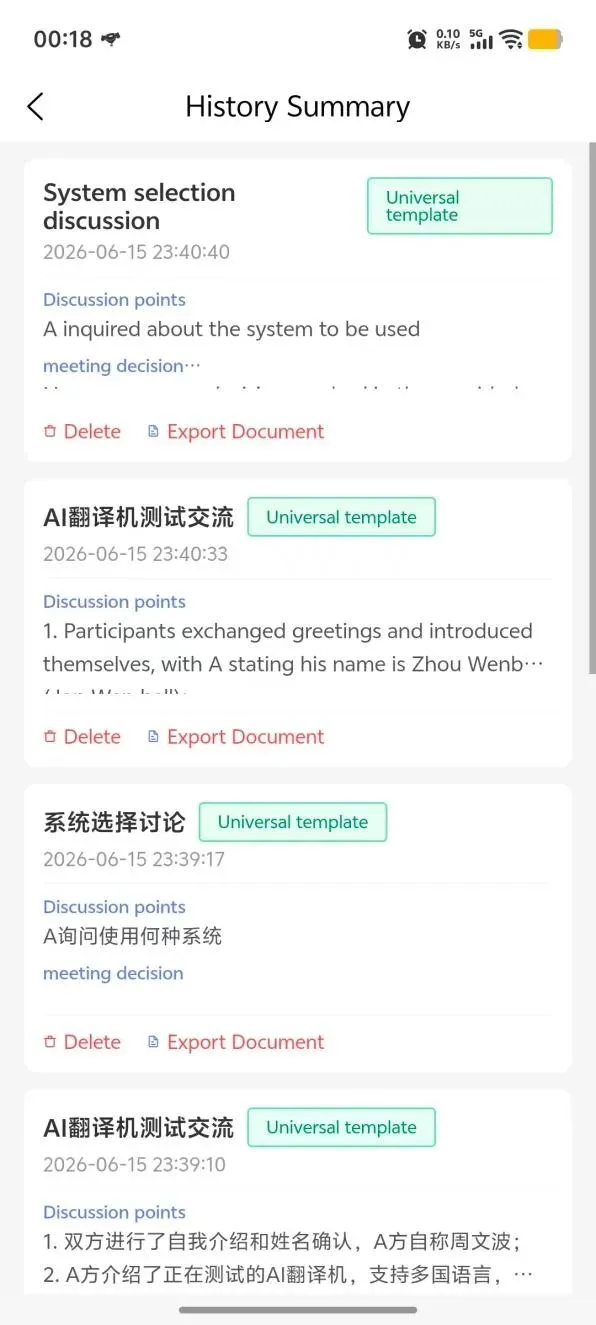
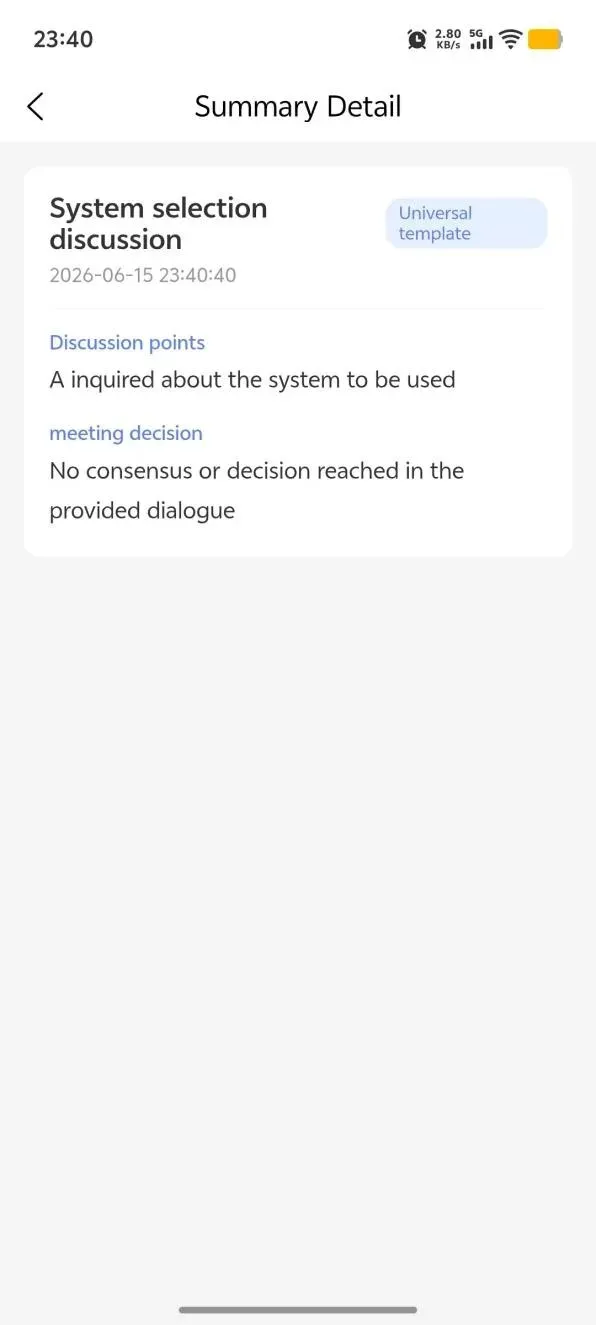
18. AI summary list and export
The AI summary list and the summary detail are generated in the app; the document can be exported for sharing.
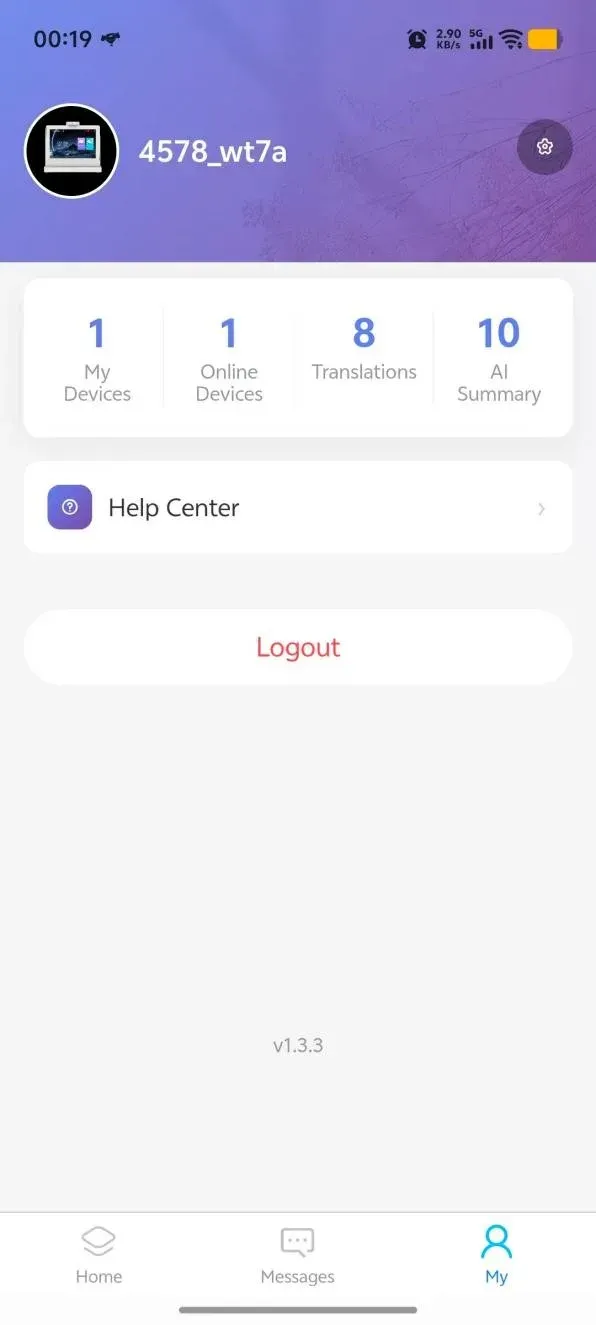
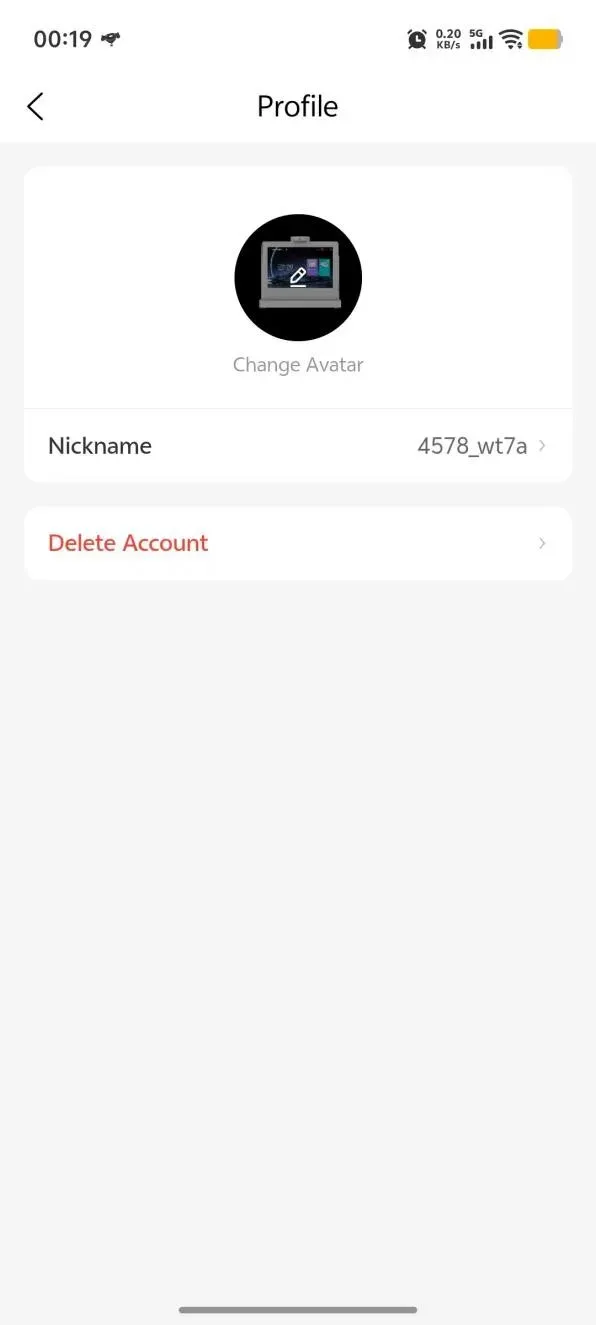
19. Profile and account settings
The profile page shows your overview information. Open settings to change your avatar and nickname, or to cancel the account.
Appendix: guide figures
Every figure referenced in the 19 steps above, in order.